A great cookout starts with a great fire. And nothing’s more of a drag than struggling to get your charcoal lit! But proper preparation can make the process go smoothly. A few simple steps can help get a great fire burning quickly.
Storing The Charcoal – The First Step To Easy Starting
The first step to a good fire is keeping your charcoal in good shape. And that means DRY.
Damp coal is nearly useless. Be sure to store it in the proverbial cool, dry place! The heavy paper bag that most charcoal comes in does a decent job of keeping its contents in good shape. But you have to do your part, too.
Garages and basements can be damp. If you store charcoal in places like that, we recommend that you put it in a rubber storage container (in its original bag, of course). Be sure to fold over the top of the bag if it’s already open, too!
You’ll be cursing yourself if you try to light your grill only to find that it’s too damp to start.
Read our guide to the best charcoal grills!
Tools To Have On Hand
It doesn’t take much to get a charcoal fire started. But it’s good to remember what to have on hand
Matches are sometimes enough, but an igniter makes things easier. It can keep the flame burning longer and keep your fingers at a safe distance.
There are even electric igniters that burn hotter and get your grill going faster. These are handy but can be expensive. They do save you some effort, though. You turn them on and leave them under the coal until the coals are glowing.
To make it easy to start any fire, some kindling helps. Some crumpled-up newspaper or scrap paper, or even torn-up cardboard, serves the purpose well..
Lighter fluid is an old standby and a huge help on many occasions. Use about a third of a cup to douse the ashes before lighting them. BUt never spray lighter fluid on lit coals! The stream of fluid can ignite in the air and the flames can reach your body faster than you’d expect.
Finally, a charcoal chimney makes the job easier. A charcoal chimney is a tall tube that lets you arrange the coals inside and light them from below. The tower provides ventilation to help the coals burn hot. Once they’re burning at a good temperature, simply remove the chimney and start cooking!
Arranging The Coal
A charcoal chimney is a good option. But if you don’t use one, there’s still an “ideal” arrangement to get your fire going.
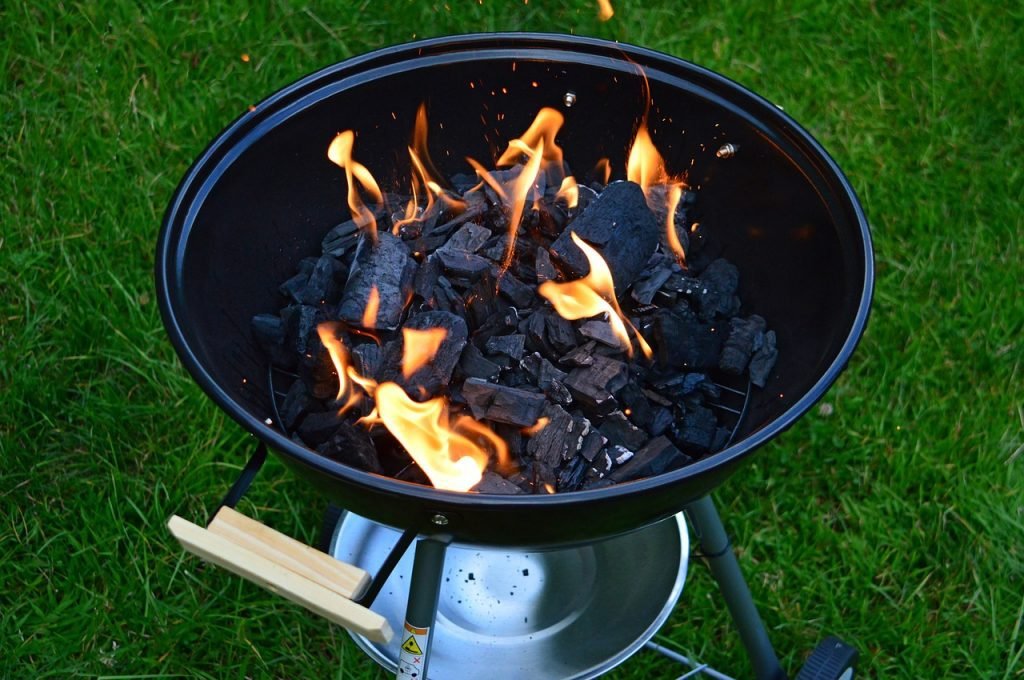
The basic idea of a chimney still works, and the best shape you can get without support is a pyramid. Light the coals at the bottom and allow the hot air to move upwards and light the remainder of the stack.
Once the coals are grey, they’re ready to cook over. Use your long-handled tools to move them around. If you need a single hot zone for cooking, spread them evenly around the grill. If you need a cool zone for indirect cooking, though, push the coals to one side.
Keeping It Burning
Keep your charcoal stack at least two deep to help it burn best. Too think a layer leads to it burning out quickly.
Most grills also have dampers – small ports on the bottom or the lower part of the sides. Keeping these open allows air to circulate – a key to maintaining hot, burning coals.
There’s no need to knock the grey ash off coals. In fact, the presence of the ash means it’s time to grill! It usually takes 5 to 10 minutes from starting the coal until it’s ready to cook over.
After the cookout, it’s time to clean up. Here’s our guide to cleaning a charcoal grill!
Conclusion
Delicious barbecued food may start with quality ingredients, but hot coals are an absolute necessity! Be sure to keep your charcoal dry. Stack it right and use the appropriate tools to get the fire started – both for a quick process and for your safety. With a little practice, you’ll become a master at starting the grill – and you’ll be able to enjoy your meal even more!