Few things beat the satisfaction of biting into a crisp, tangy pickle made from your very own homegrown cucumbers. If you’re excited about transforming your cucumbers into delectable pickles, you’re in for a culinary adventure.
This guide will lead you through each step of the process, from preparing the cucumbers to savoring the final product. With a little patience, you’ll soon be enjoying a delicious treat with your sandwiches or in your salads!
Getting Started
Before you embark on your pickle-making journey, you’ll need to gather the following essentials:
Fresh Cucumbers
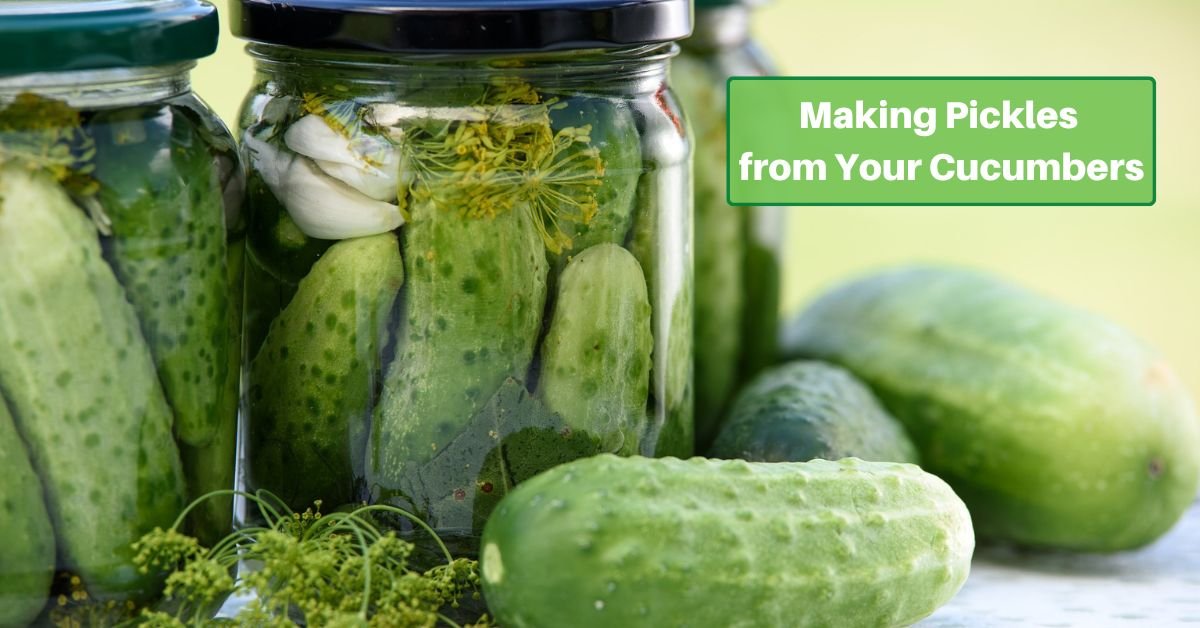
The secret to fantastic pickles lies in using fresh, firm cucumbers. You can either grow your own or source them locally for the best flavor and texture.
Brine Ingredients
To create the brine, you’ll need vinegar, water, and salt. While white vinegar is a common choice, feel free to experiment with other types like apple cider vinegar for unique flavors.
Spices and Herbs
Depending on your preferences, collect spices such as dill seed, mustard seed, coriander, and garlic cloves. Fresh dill, onion slices, and red pepper flakes can also add extra flavor and heat.
Jars
Clean, sterilized jars with airtight lids are a must for pickling. Mason jars are a popular choice, but any glass jar with a secure seal will work.
Canning Equipment
To ensure a safe and efficient canning process, you’ll need a large pot for boiling, a canning rack or trivet, a funnel, tongs, and a lid lifter.
Preparing the Cucumbers
Properly preparing your cucumbers is crucial for successful pickling. Here’s how to do it:
Wash and Trim
Rinse the cucumbers well under cold running water and trim off the blossom end; it contains enzymes that can soften the pickles. Keep the stem end intact to maintain crispness.
Slice or Leave Whole
Decide whether you want to pickle your cucumbers whole, as spears, or sliced into rounds. Different styles offer distinct textures and visual appeal.
Brine Solution
Create the brine solution by combining water, vinegar, and salt in the right proportions. For a standard dill pickle brine, try a ratio of 1 part water, 1 part vinegar, and 1 part salt. Adjust the salt to your taste.
Spices and Herbs
Add your chosen spices and herbs to the jars. Go ahead and experiment with different combinations for unique flavors!
Packing the Jars
Pack the cucumbers tightly into the prepared jars, leaving about half an inch of space at the top. Make sure to distribute the spices and herbs evenly throughout the jars.
The Canning Process
Now that your cucumbers are prepped and packed, it’s time to start the canning process:
Heat the Brine
In a pot, heat the brine solution until it simmers, ensuring that the salt fully dissolves.
Pour the Brine
Carefully pour the hot brine over the cucumbers in the jars, ensuring they are entirely submerged. Leave the designated headspace to allow for expansion during processing.
Remove Air Bubbles
Gently tap the jars on a countertop to release any trapped air bubbles. You can also use a non-metallic utensil, like a chopstick, to help dislodge air.
Wipe Jar Rims
Using a clean, damp cloth or paper towel, wipe the rims of the jars to remove any residue that may interfere with the seal.
Apply Lids and Rings
Secure the lids on the jars and screw on the rings until they are fingertip-tight. Don’t overtighten; it could prevent proper sealing.
Process the Jars
Place the filled jars on a canning rack or trivet inside a large pot of boiling water. The water should cover the jars by at least an inch. Process the jars in a boiling water bath for the time specified in your pickle recipe, which can range from 5 to 15 minutes, depending on your altitude and jar size.
Remove and Cool
After processing, use jar lifters to carefully remove the hot jars from the water bath. Place them on a clean, dry towel or cooling rack to cool naturally. As they cool, you should hear the satisfying “pop” of the lids sealing, indicating a successful preservation.
Storing Your Pickles
Proper storage is essential to preserve the quality and safety of your homemade pickles:
1. Cool, Dark Location: Store your sealed jars in a cool, dark, and dry location. A pantry or cellar is ideal, as excessive light and temperature fluctuations can affect the quality.
2. Label and Date: Label each jar with the contents and the date of processing. This helps you keep track of the age of your pickles.
3. Shelf Life: Properly canned pickles can last for up to one year or more when stored correctly. However, for the best quality, aim to consume them within the first 6-12 months.
4. Refrigeration: Once opened, refrigerate your pickles to maintain their freshness and crispness. Use them within a few weeks for the best flavor.
The Waiting Game
While the anticipation can be excruciating, homemade pickles need time to develop their flavors.
The First Day
Let your pickles cool and rest for at least 24 hours after processing. This resting period allows the flavors to meld and intensify.
Flavor Development
Most homemade pickles benefit from additional time to mature. For optimal taste and texture, it’s best to wait at least a week or two before opening and enjoying your first jar. Some pickles, like bread and butter pickles, may require longer aging.
Regular Tasting
Periodically taste your pickles to see how their taste has progressed. This will help you determine when they have reached the desired level of tanginess and crunchiness.
Turning homegrown cucumbers into pickles is a delightful way to savor the flavors of your garden year-round. With the right ingredients, equipment, and careful attention to detail, you can create batches of delicious pickles that reflect your unique taste preferences.
From selecting fresh cucumbers to perfecting your brine and achieving that unmistakable crunch, pickling at home is a rewarding journey that results in delectable treats for your palate. So, roll up your sleeves, gather your cucumbers, and start pickling for a taste of homemade goodness like no other.